💎GENEALOGY GEM: When you start a new file for your research in RootsMagic you will need to name the file. I generally use the Surname of the line I am researching and use the month and year that I start the file. As I backup my file(s) each month I rename them according the month and year of the backup. This is helpful in the event of a computer crash for restoration purposes.
Drop Down Menu: Starting out we will look at the drop down menu buttons at the top of the RootsMagic (RM) file.
 |
| Drop Down Buttons in RootsMagic |
Edit: This deals with an individual and you can delete a person/fact, unlink a person or family and view LDS ordinances here
Lists: opens up various lists in RM such as addresses, sources, places, etc.
Add: allows you to add a parent, child or spouse to your file
View: you can view your pedigree or family here, other features such as descendants, people, websearch and timeline are available for full RM users.
Search: you can search for a person from an individual or family list
Reports: family group records, pedigree charts and other reports can be printed from this button
Tools: provides options to make your file unique by color coding people, search for problems and merge people among other features
Internet: TreeShare for Ancestry is located under this tab as well as look up FAQs, see latest news from RM as well as read message boards
Window: this allows you to decide the view of your files - vertical, horizontal or cascaded
Help: houses webinar links, tech supports, handouts and other support features
Image Buttons: These buttons are located directly below the drop down menu.
| Image Buttons in RootsMagic |
Folder opens an already created file or allows you to open multiple files
Person + allows you to add a person to your file
Person with pencil user can edit the highlighted person in their file
Printer allows you to select reports that you want to print
Books helps to create a family history book
Magnifying glass is a shortcut to search for a person in RM by name or record number
Tree is for users with the full RM program
Merge Sign is a shortcut to merge people in your file if duplicates are imported or created
Notebook is a shortcut to edit notes on the individual highlighted
Certificate allows you to look at sources for an individual, family or all sources at once
Camera allows access to media for the individual or all media in file
Envelope you can see addresses for the individual or all addresses in your file
Sticky Note allows users to create a to-do list for an individual, family or file
FamilySearch Tree opens FamilySearch Central which is the link to accessing FamilySearch through RM
Door is a logout button
Down Arrow allows user to edit image buttons by adding, removing or reordering buttons
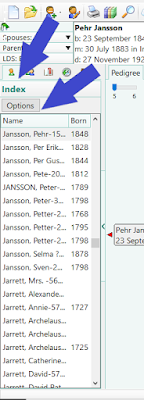
Synopsis Box: This is a simple information box on the individual highlighted whether the user is in pedigree or family form of their file. You can see spouse(s), parents, LDS information as well as full name and vital information.
 |
| Synopsis Box in RootsMagic |
 |
| RootsMagic Index |
💎GENEALOGY GEM: users can alternate the width of the column by hovering on the right edge of the index column and adjusting when the cursors changes to an adjustment symbol.
"Main Screen" View: The main section of the screen can be viewed as a pedigree or family chart for basic users. Full program users have more options which will not be discussed in this post as I only have the basic free version and am very happy with it.
 |
| Main View Options |
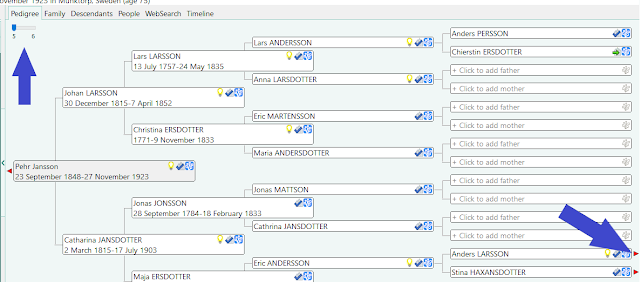 |
| Users can select 5 or 6 generation viewing and maneuver through generations using red arrows |
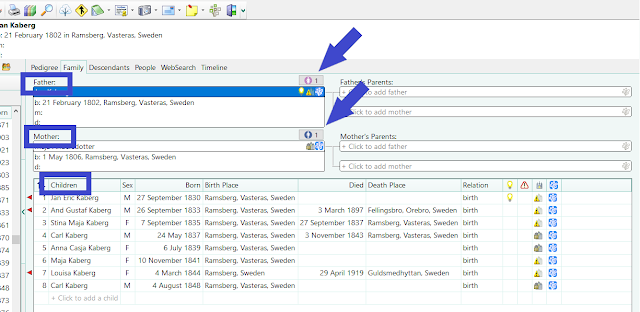 |
| Family View of RootsMagic |
Descendants, People, WebSearch and Timeline are available through the full version and will not be discussed in this post.
Adding a Parent or Child to RM: As information and records reveal family members, the user can add family information by following the steps listed below.
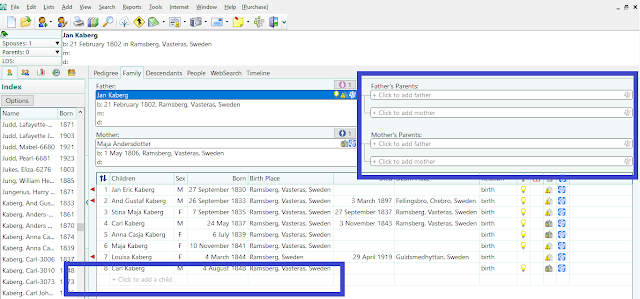 |
| Select the appropriate relation box to add a person |
If the person is NOT in your file you will click "Add NEW person"
If the person is already in your file but needs to be connected to a family click "select EXISTING person"
 |
| Adding a new or existing person to RM |
Add a mother - the surname will be blank if the father is not already filled in; always use the name before she was married
Add a child - the surname will autofill if the father's information is filled in but can be edited as needed
Add as much information as possible using birth/death date(s) and location using about/after/before if needed
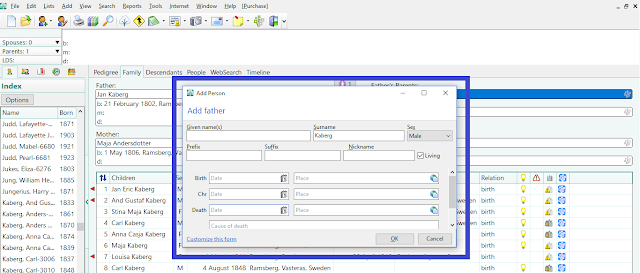 |
| Add a Father |
💎GENEALOGY GEM: users can customize the add person form by clicking on the blue hyperlink in the lower left corner of the Add Person screen. Click on "Customize this Form" and the user can add various life events and information to the Add Person form.
✍TAKE NOTE: once you customize the Add Person screen that information will be shown in every Add Person box
Editing a Person in RM: By double clicking on a name in the index, family or pedigree view a "profile" page will appear for the person you selected allowing you to add information regarding the individual chosen.
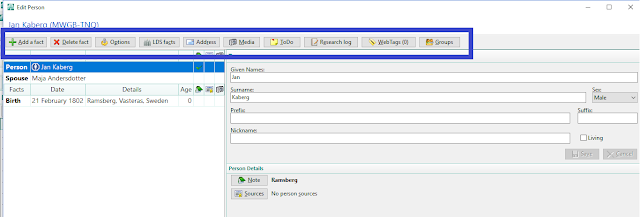 |
| Edit Person Screen |
In Edit Person mode users can:
Add a fact to a person such as christening, census information, military registration or service, education, occupation or social security number among other facts
Delete fact(s) about a person
View LDS ordinances for the individual if you have this feature enabled
View addresses for the person in their "profile" or select from a main list
View media attached to the individual or select from media file
Create and view a to-do list for the individual
You can add/view/delete notes specific to the person you are viewing
Attach/view/delete sources associated with life events for the individual
My best recommendation for those new to RM is to tinker around with it. Familiarize yourself with the buttons and learn by doing.
💎GENEALOGY GEM: Remember that trees from Ancestry and FamilySearch can be imported to your RM file!
Congratulations and happy tinkering! Now go have some fun!
No comments:
Post a Comment